
This week, we are going to reverse engineer some photos to better understand three great guidelines to photography: Rule of Thirds, Leading Lines, and Depth of Field. Let’s get started.
Rule of Thirds

https://www.viewbug.com/blog/rule-of-thirds-extravaganza-photo-contest-finalists
This image of a lighthouse is a great example of the rule of thirds. By drawing lines vertically and horizontally, like in tic tact toe, you can divide the picture up into nine different squares. Photos become more interesting when the subject is placed near one of the intersecting points. In this example, the horizon is on a line, and the lighthouse is also, creating an interesting photo.

Personal Example

In my own example, the middle of the tree trunk is near the intersection of the rule of third lines By doing this, it is creating a strong focal point. The image may not be as interesting had I chosen to place the tree trunk in the very center.

Leading Lines

http://www.blurb.com/b/4109454-tunnelbana
Another great guideline in photography is leading lines. In some photographs, you can find lines that lead you to a focal point or a vanishing point within the photo. This helps the viewer’s eye travel through the photo. In this example, many lines on the walls, floor, and ceilings are leading to the very center of the image.

Personal Example

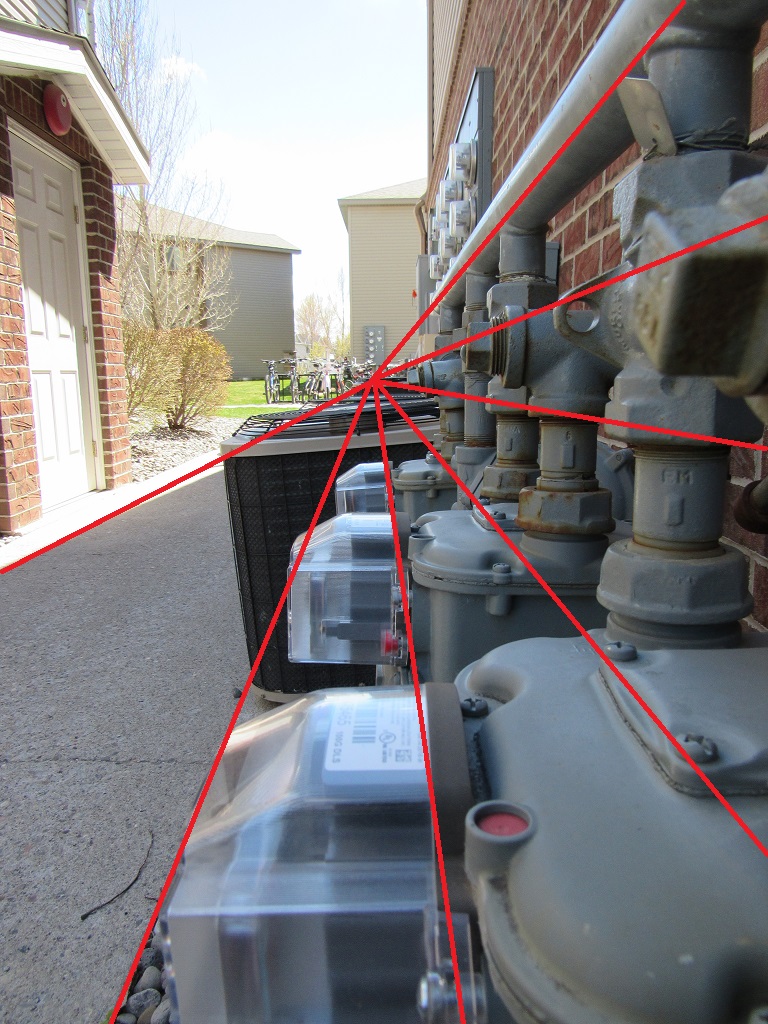
In this example, I use the sidewalk, the shadow, and the electric boxes to create leading lines. Not all of the lines can be seen physically in the picture, but that does not mean that they are not there. Leading lines in this photo lead the viewer through the foreground to the background.
Depth of Field

http://www.picturecorrect.com/tips/do-you-understand-depth-of-field/
Controlling your depth of field is another great technique in creating a great photograph. By doing so, you make your image less flat, and give your a viewer a place to focus on. You can have shallow or deep depth. Shallow depth means that the foreground or background of the image is clear, while the other is blurry. With deep depth, all of the picture is in focus. In the example, you can see that the photographer is using a shallow depth of field. The man is in focus while there are elements around him that are blurry. This gives the image depth, and helps the viewer to focus on the subject.

Personal Example

The example shown here is another example of a shallow depth of field. In the image, the tree is sharp and clear, while the background is blurry. Since the background does not contribute much to the composition or subject of the photo, having it blurry allows the viewer to more easily focus on the subject, the tree. (Below, the circle shows the subject in focus in the foreground, and the arrow pointing at the blurred background.)

Conclusion
Now that we have learned three great guidelines for shooting fantastic photos, go out and try it! Experiment using combinations of these guidelines, and try to create a photo that has depth, leading lines, and is framed in the rule of thirds. This will no doubt improve your shots and help you take interesting photos. Have fun!
